Prerequisites
- Products: Liquid UI WS, Liquid UI Server or Local DLL, Client Software
- Commands: radiobutton(), del(), pos(), title(), noinput(), set(), box(), comment()
Purpose
In this article, you will learn how to customize the Create Material Screen by repositioning screen elements and converting dropdownlist to radio buttons. Step by step process to customize the screen is as follows.
- Delete multiple screen elements
- Reposition screen elements
- Resize group box
- Convert dropdown to radio buttons
- Add screen elements
- Set the default value to the input field
- Make field read-only
- Add instructions on the screen
- Change the existing terminology
- Change dropdownlist values to radio buttons
User Interface
//Create this file inside your script folder for customizing Create Material (Initial Screen): SAPLMGMM.E0060.sjs
//Now, let's add the Liquid UI script to the above file and save it.
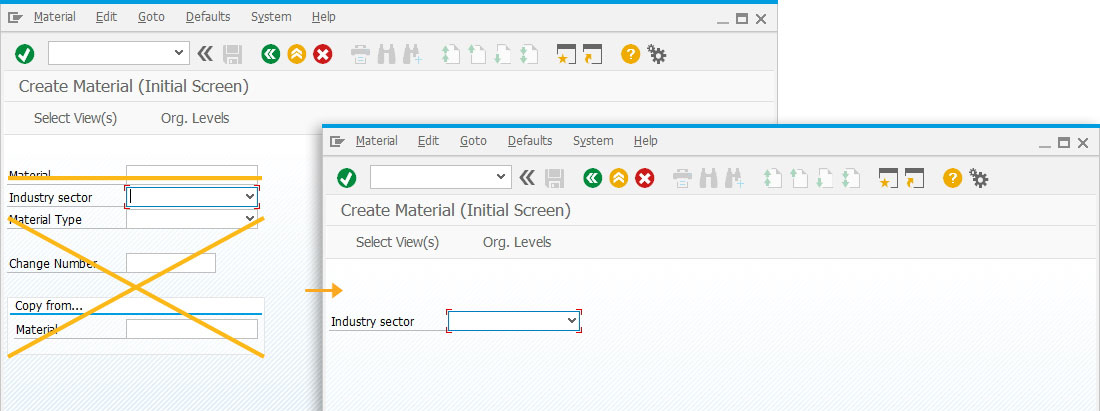
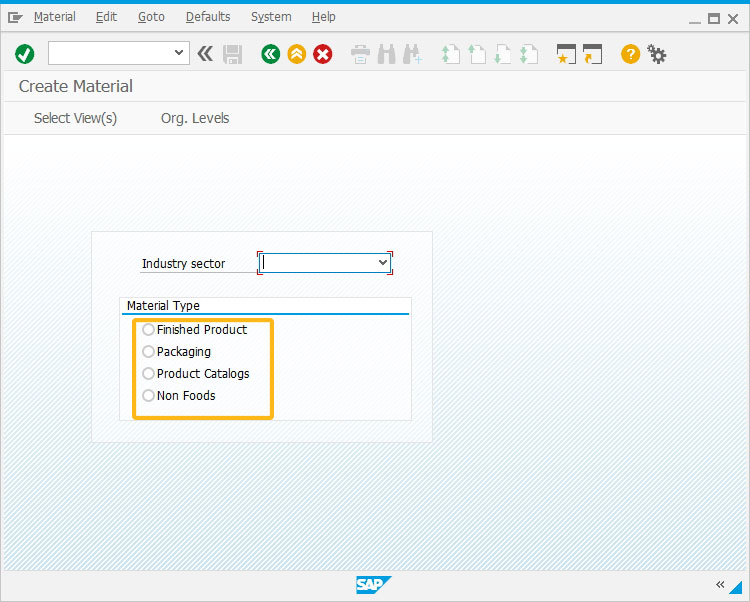
- Delete redundant/unnecessary screen elements.
We'll eliminate the Material, Change Number, and Material Type input fields and Copy from.. group box element.
//Deletes the following fields from the SAP screen.
del("F[Material]");
del("F[Change Number]");
del("G[Copy from..]");
del("F[Material Type]");
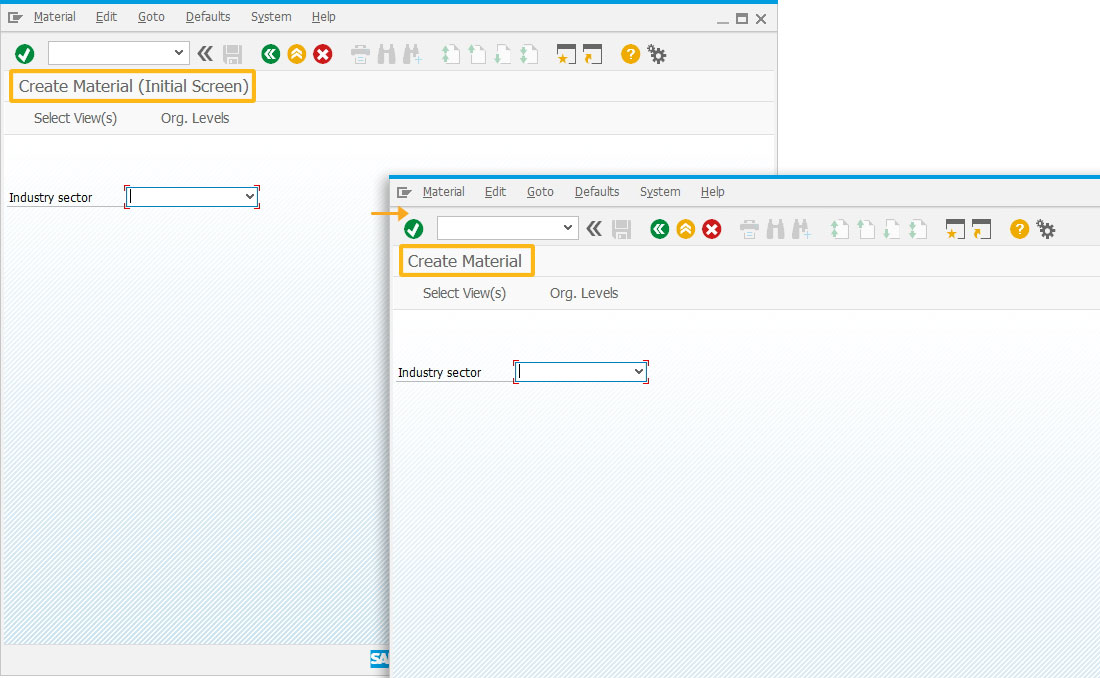
- Change the SAP screen title.
Using the title command, change the title of the screen Create Material (Initial Screen) to Create Material.
//Changes the title of the screen to Create Material.
title("Create Material");
- Change the position of the Industry sector field to rearrange the fields.
//Changes the position of Industry sector input field.
pos("F[Industry sector]",[5,19]);
- Add a group box to collate related screen elements.
We will add two group boxes, one without a title, and another with Material Type as the title.
//Creates a group box around Industry Sector
box([4,12],[13,59],"");
//Creates a group box Material Type
box([7,16],[12,56],"Material Type");
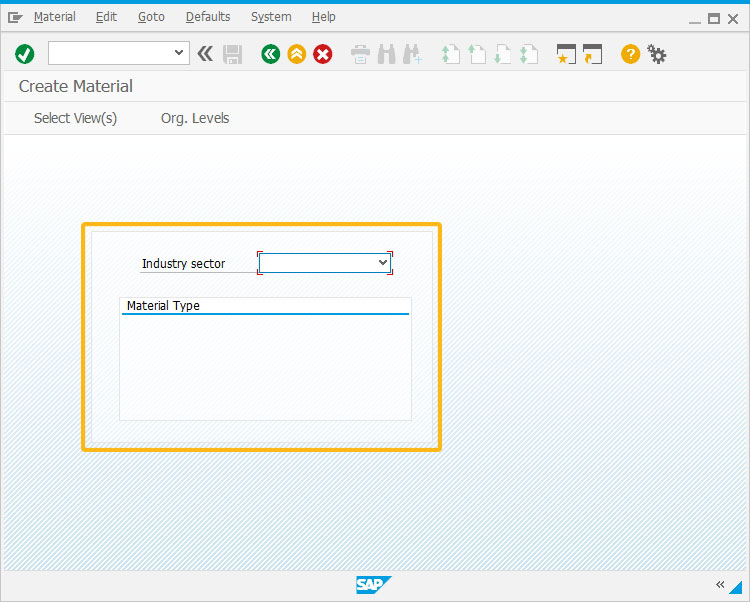
- Change the Material Type dropdown menu values to radio buttons. You can select any radio button to pass its value to the Material Type field.
//Creates four radio buttons
radiobutton([11,19],"Non Foods",{"[material type]":"NOF1"});
radiobutton([10,19],"Product Catalogs",{"[material type]":"WERB"});
radiobutton([9,19],"Packaging",{"[material type]":"VERP"});
radiobutton([8,19],"Finished Product",{"[material type]":"FERT"});
 Learn more about radiobutton and available options.
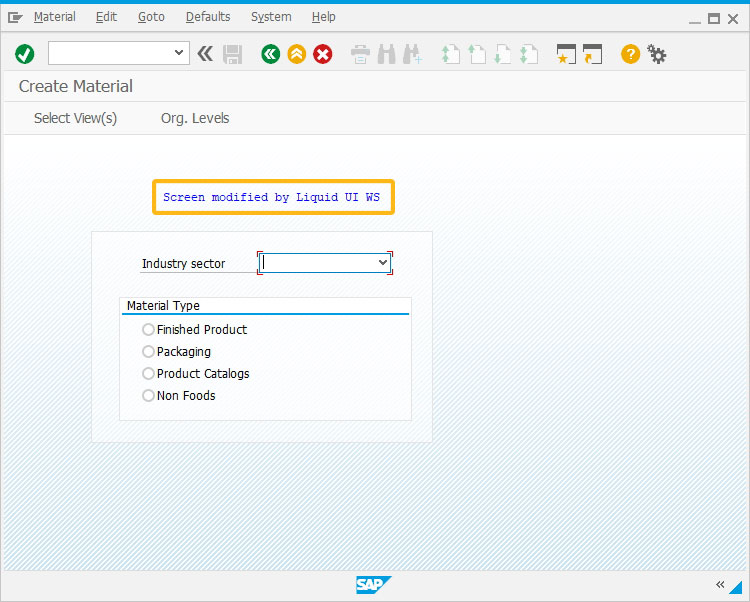
 - Add a comment on the screen to notify users that the screen is customized using Liquid UI WS.
//Adds comment about the screen
comment([2,22],"Screen Modified By Liquid UI WS",{"size":28});
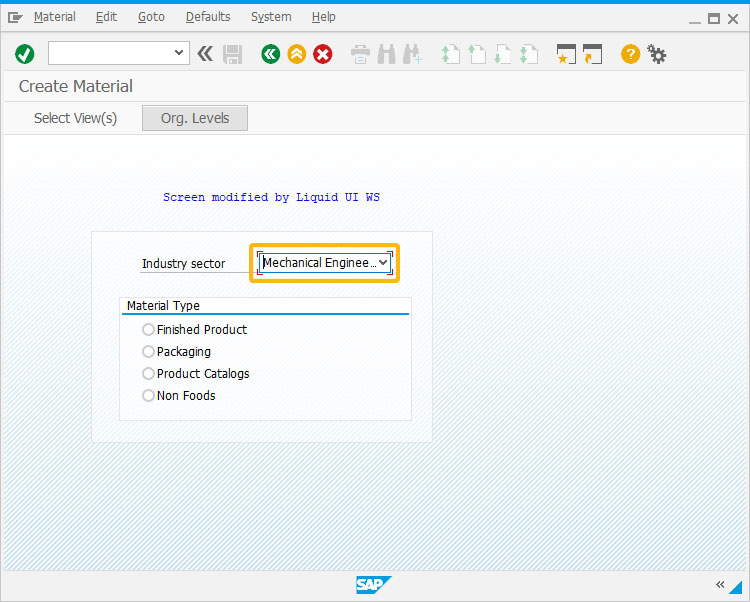
- Assign a default value to an input field.
We will set value M to the Industry Sector field where M represents mechanical engineering.
//Assign a value to the Industry sector.
set("F[Industry sector]","M");
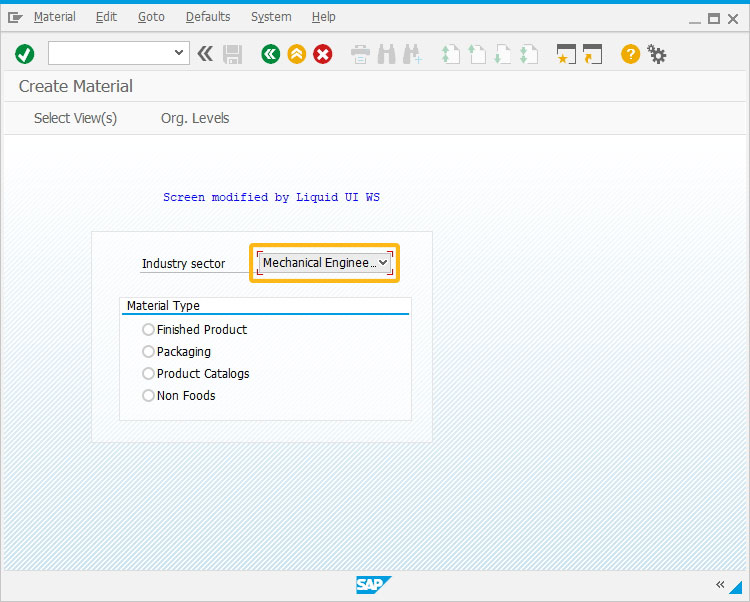
- Using the noinput command. Set the Industry Sector field as read-only.
//Set the industry sector field as read-only.
noinput("F[Industry sector]");
SAP Process
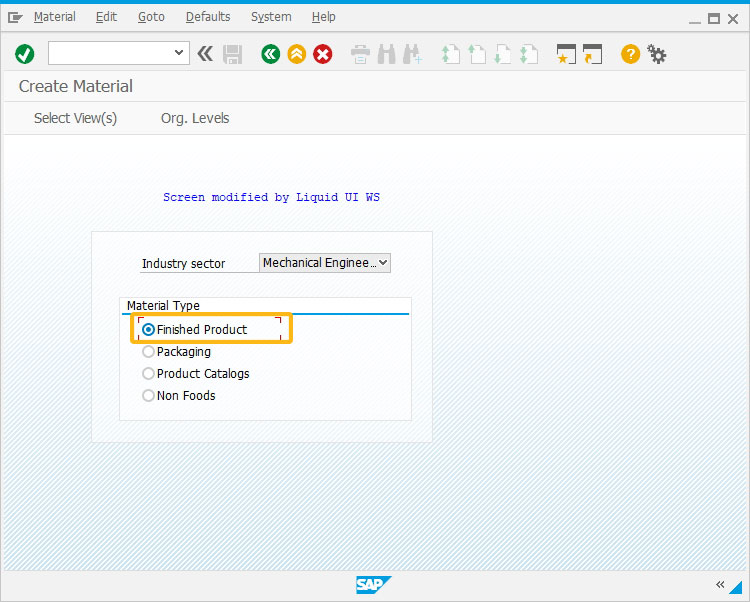
- Refresh the SAP screen and select any radio button to assign its value to the Material Type input field to create a material, as shown below.
Next Steps

This article is part of the 3.0 Customize your existing SAP screen tutorial.


